


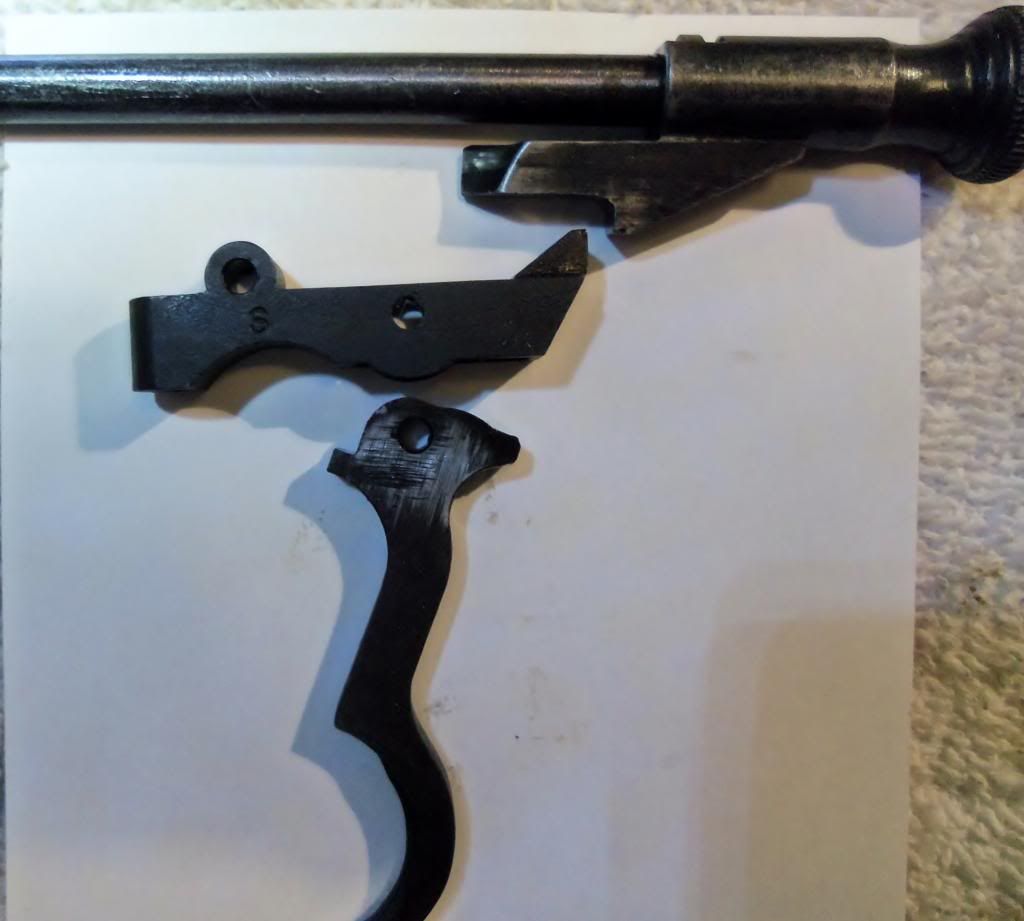
I included a photo of the
SEAR
TRIGGER
STRIKER (BOLT)
no springs or pins
If you look at the photos there are two places where you can help your rifle or REALLY REALLY HURT IT.
If you look closely at the striker you will see at the bottom a sharp 90Degree turn
if you look closely at the sear you will see another sharp 90 degree turn. at the top
when you pull that trigger and complete the first stage and then the second stage takes over and when you have pulled the sear down the strike goes forward and bang.
for the sake of argument there are four surfaces that effect the trigger, and working on them takes time and a good good stone,
before anything else is said, remember this IF YOU ROUND OFF THESE 90 DEGREE TURNS YOU MIGHT AS WELL THROW THEM AWAY
However careful stoning of the surfaces can improve your trigger, and only run item one direction on stone towards the turn. Now you can also shorten the 'creep' with a stone, can shorten it by stone work on sear and trigger, where these two meed is where the rubber meets the road so to speak, make the surfaces straight and you will improve the trigger,
missing is the spring, yes, the spring is adjustable by shortening it somewhat, i have taken wt off by putting spring in a set of hemostats and putting to a grinder and removing metal, need a very very LIGHT touch here, too much gone and throw it away, might not be a bad idea to go to numrich and get some extra springs to practice with, i have even taken weight off by using a file, when you pull the trigger the spring compresses and that is your trigger pull wt, the smoothness and the crisp is what you accomplish on a wet stone
now if you look at the top of the trigger you will see two humps, one is first stage and the other is 2nd Yes you can shorten first stage, but again get another trigger to play with

 Reply With Quote